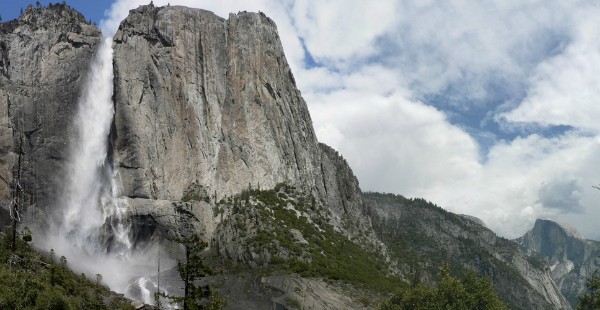
Upper Yosemite Falls Hike! & a Lesson in Trail Construction?
It is May in Yosemite and you know what that means – Waterfalls! The snow in the high country is melting and recently (well, last week at least) we have been receiving some hot summer type weather. Springtime is the best time for waterfalls every year, but less with the than average amounts of rain/snowfall this winter the waterfalls might dry out sooner rather than latter this year. :(
This is Curtis & I’s third springtime waterfall-centric pilgrimage down to the valley. The first year we did the standard driving tour & hiked inspiration point, the second year was our first & very rainy trip up the mist trail, but this year we finally are able to check the Yosemite Falls trail off our bucket list! I honestly do not know why we had not hiked this trail sooner, I would tell anyone who is interested in a strenuous hike in the spring to check this one out – it is a little bit less of a zoo than the Mist trail but still offers views of the falls + Half Dome. I am always a sucker for a good view with Half Dome.
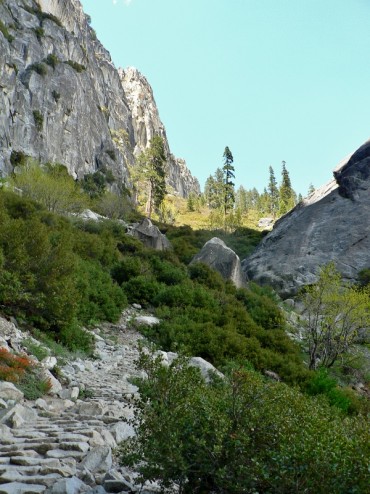
Nearing the top of the 2,700 ft elevation gain on the trail. This part of the trail is luckly more like stairs and less like a sandy slope!
Upper Yosemite Falls Hike
Trailhead: The trail is between Camp 4 and the Lower Yosemite Fall viewing point in the valley, closer to camp 4. I believe you can try parking in a designated lot in Camp 4, but many of the climbers claim these areas – we instead parked by the Yosemite Lodge (which is also busy). If you really cannot find a place to park you can take the bus… but be aware of when service stops and make it back to your car before then! (Been there, done that, ran into a bear, had to take the extra long way to the car.)
Distance: 7.4 miles round trip claims the national park – my GPS did not work super great on this trail for some reason, but I think that is fairly accurate.
I have started hiking the Upper Yosemite Falls before, 2 summers ago in the hot early summer, but had super underplaned. Arriving late, probably around 3pm and in my Teva sandals it became fairly obvious that making it to the top that day would be more effort than it was worth. Luckily the first stop on the hike, the Columbia Rock vista of the valley, is only about 1 mile in – so after that point I turned around and headed back. Because if you need 2 things on this trail it is time and proper footwear.
Trail Facts Timeout
Pavers and Stone Armoring on Trail Tread
The Upper Yosemite Falls Trail has over 60 switchbacks, most of which are armored with natural stone pavers – a common practice throughout many Yosemite & Sierra trails (I am looking at you hike from Merced Lake & to Pate Valley). Having worked building trails and by doing research I somewhat understand the reasoning behind this trail construction.
Probable Reasons for Using Natural Trail Pavers:
- Pavers help to stabilize unstable soils, and are especially useful in on steeply cross sloped & backsloped trails.
- Stone pavers look natural, many of the other parts of this trail are already this smooth granite!
- Heavy traffic, especially in the Valley hear means these trails need to take a beating.
With all that said I often find myself cursing the existence of trail pavers, especially those in heavily used areas with sandy decomposing rock littering the top sides of these rocks. The sloped granite pavers do not offer the best traction to start, and then once they become wet or sand they become even more slippery. I must have seen over a dozen people fall on this trip because of their Keds shoes not making the cut, descending too fast, not paying attention, or a combination of any of these. Being prepared with good footware and remaining concentrated both Curtis and I made it down without any falls, but it cold easily happen to anyone. The moral being be prepared, and be careful, maybe even bring your hiking poles if you are into that on day hikes.
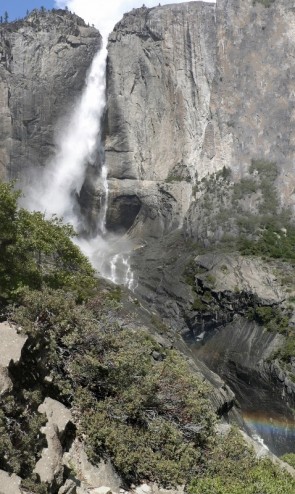
Upper Yosemite Falls
After the 1 mile hike to Columbia Rock you will reach a lovely break in the climb and hike through shaded oak trail for about a half mile until reaching the upper falls view. This is the most beautiful part of the hike, in my opinion, offering a close up view of this 1430 ft drop along with the rainbow released from the spray.
After stopping for a snack we continued up the next couple miles straight uphill to the valley rim and falls overlook. Enjoy the brief beginning of this stretch of the journey which is shaded and slightly misty, and then prepare to power up the un-shaded slope. Yosemite hikes compares the climb on this trail to 2 trips up the empire state building and my calves concur!
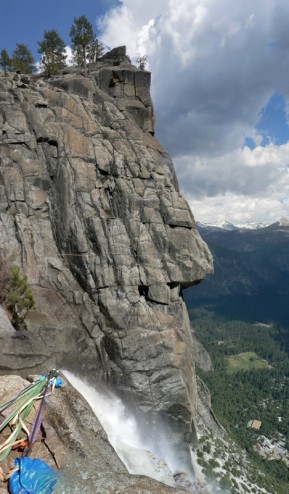
Yosemite falls overlook – And yes that is a slackline, walking over the falls is a thing, FOR CRAZY PEOPLE.
As the trail finally tops out on the valley rim you are greeted by wonderful shade and backcountry signage directing you to the falls overlook, Yosemite point, and the many other higher country destinations. Curtis and I traveled to the overlook which is past a popular hiking resting spot, down a series of steep & narrow stone steps (probably not for the faint of heart), and found the guardrail that you could peer over.
The overlook point is more of a sensory experience than a photo-op. The water roars as it falls from Yosemite Creek down the falls, much like a more delicate and graceful Vernal Falls. If you have time in the spring, after the snow clears enough for the upper trail to open, and before Yosemite Creek dries up for the summer it is a feel it to believe it experience. & Not until I was writing this post did I realize we completely missed “Oh My Gosh Rock” (Is that what we are calling it, really? Is this a ploy to make foreigners think Americans really say the work ‘Gosh’?)… so Curtis and I might be making a return trip again sometime soon!
More pictures from out hike in the Gallery below:





 Hello! I am a 30-something outdoors-lady, backpacker, and resident of Groveland, California -



Follow Me: